Customer.io Tutorial: How to Send Messages Through Dexatel


Published: Jul 31, 2023

Strategic partnerships between service providers often come as an advantage for the businesses that use those services for various purposes. That is the case with Dexatel and Customer.io, who partnered up to give users the opportunity to make the most of both platforms through integration. Clients of Customer.io can now benefit from Dexatel’s solutions for their business text messaging needs.
How Customer.io Users Can Benefit from Texting Solutions
As a provider of marketing automation solutions, Customer.io provides its users with the control and flexibility they need to communicate with their audiences. It does so by making use of logic-based tools as well as behavioral analytics. With automation tools already in place, clients of customer.io can take their messaging to the next level by leveraging a variety of other SMS solutions.
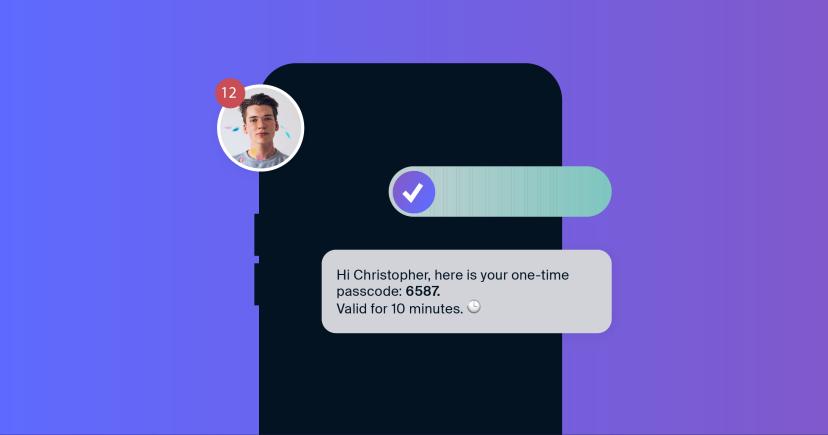
Services like personalization and bulk texting allow businesses to benefit from a wider reach, enhanced efficiency, increased customer engagement, and cost-effective communication. And that’s where Dexatel comes in.
Why Choose Dexatel for Integration
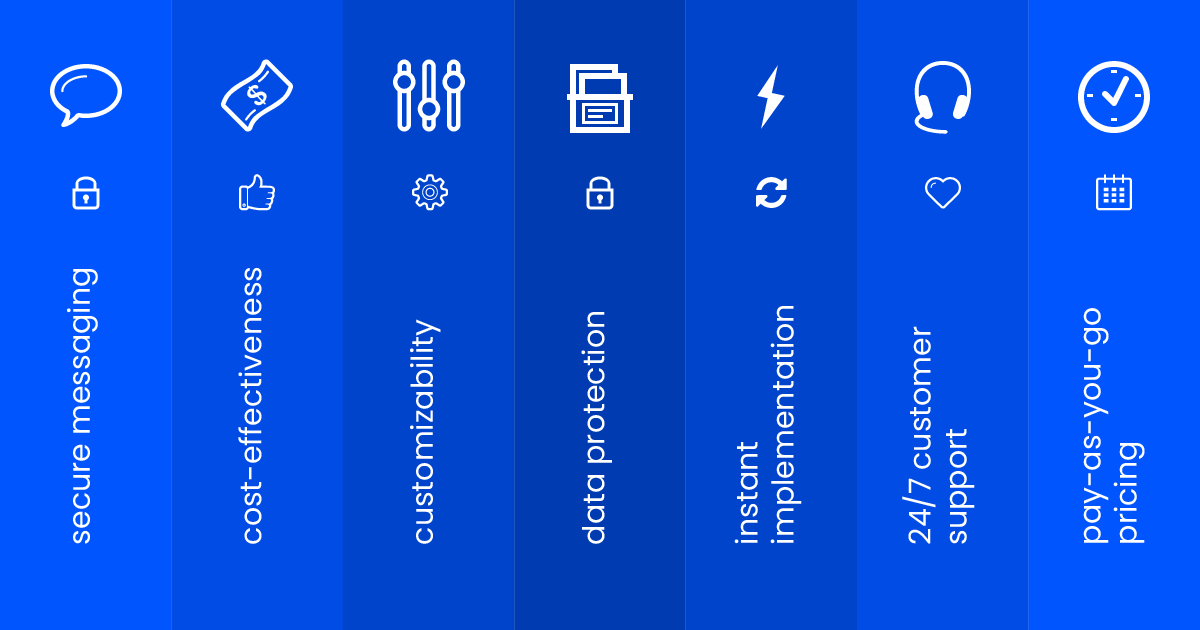
Thanks to the partnership between the two companies, Customer.io users don’t need to look further than Dexatel for texting solutions. Dexatel’s communication platform is designed with secure, effortless, and cost-effective messaging in mind. With perks like customizability, data protection, instant implementation, 24/7 customer support, and pay-as-you-go pricing, businesses can communicate with their audience in confidence knowing that they’re equipped with industry-leading tools.
Text Message API Service Pricing
Dexatel employs a pay-as-you-go approach that charges you per sent message. This is the most affordable SMS gateway pricing model, and the service costs are free of setup, monthly, or any other fees.
How to Integrate Dexatel With Customer.io
Integrating the two platforms lets you send text messages with Customer.io through Dexatel. To do this, you’ll need to start by setting up a Dexatel account. Here’s how:
1. Sign up for an account with Dexatel
2. Set up a Sender ID that you’ll be using to send messages
3. Create an API Key for the integration
After completing these preliminary steps, you can move on to creating a campaign in Customer.io.
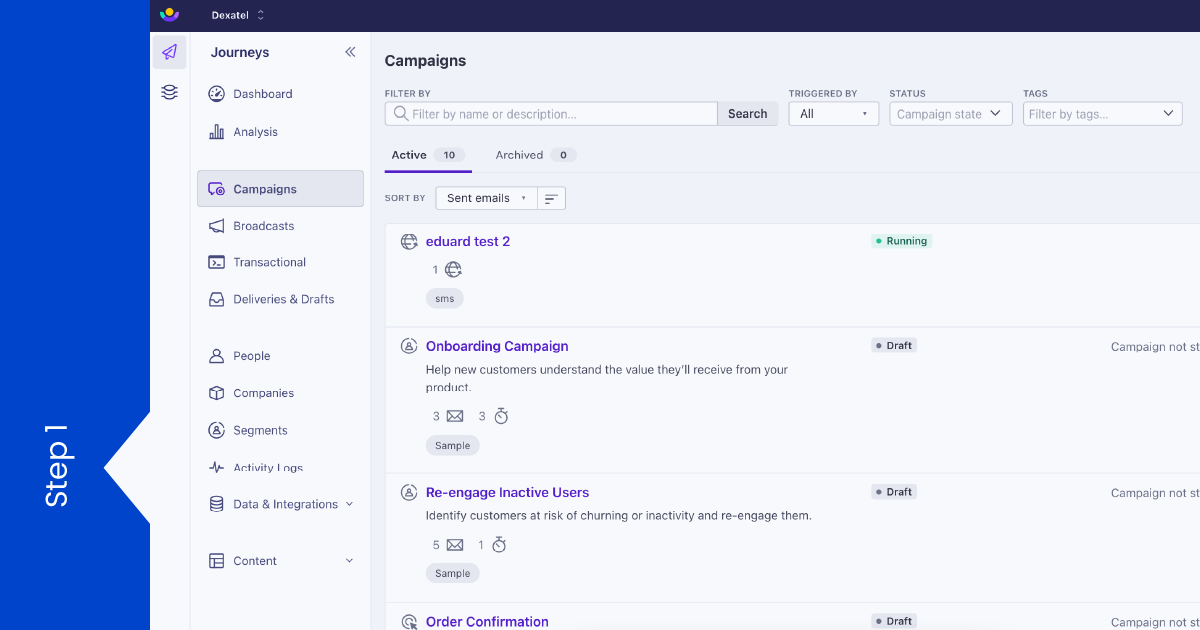
Create Your Campaign in Customer.io
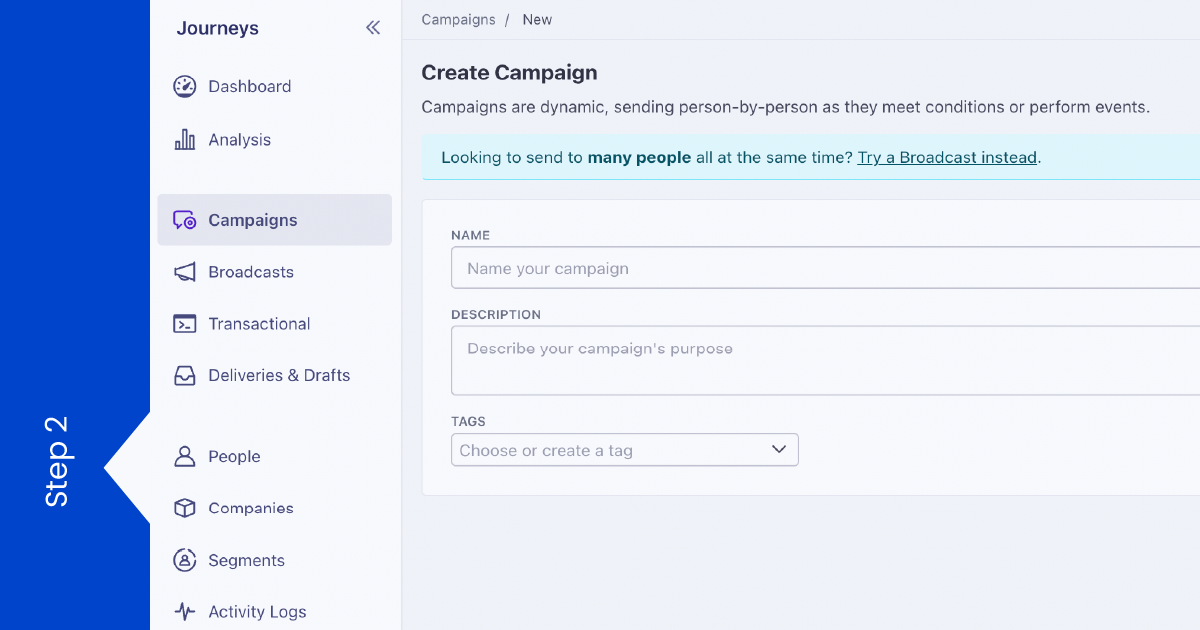
1. Head over to “Campaigns” and click on “Create Campaign”
2. Give it a discernible name and description, and select “Create Campaign” again
Set Up a Trigger
1. Go to “Triggers” and select “Create your own trigger from a webhook”
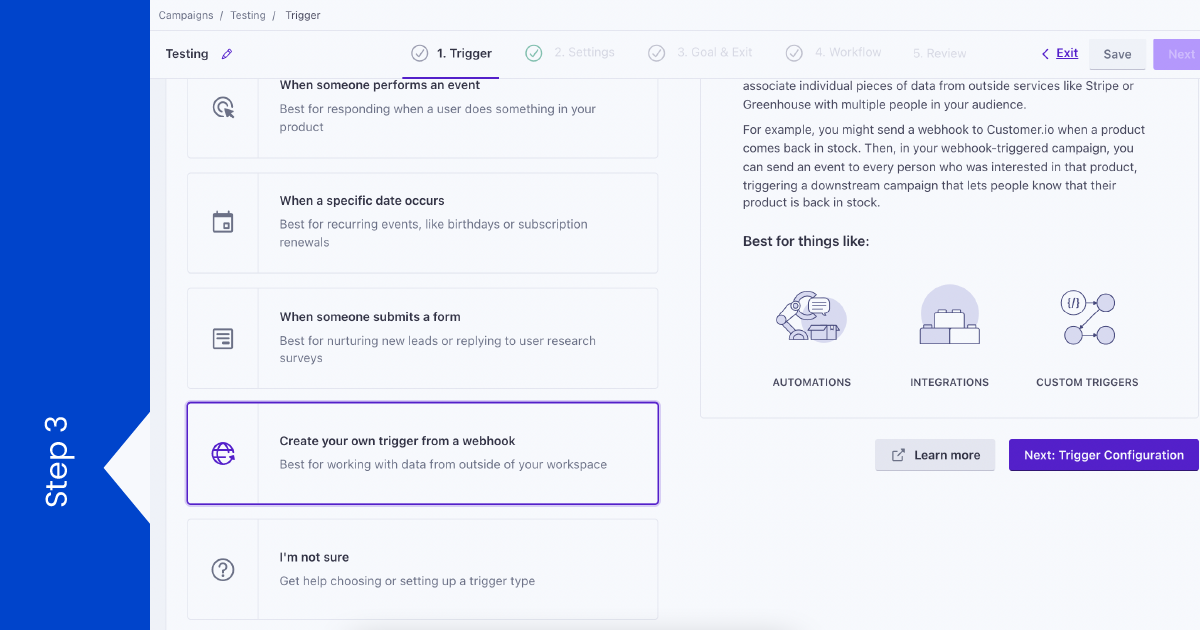
2. Click on “Next: Trigger Configuration”
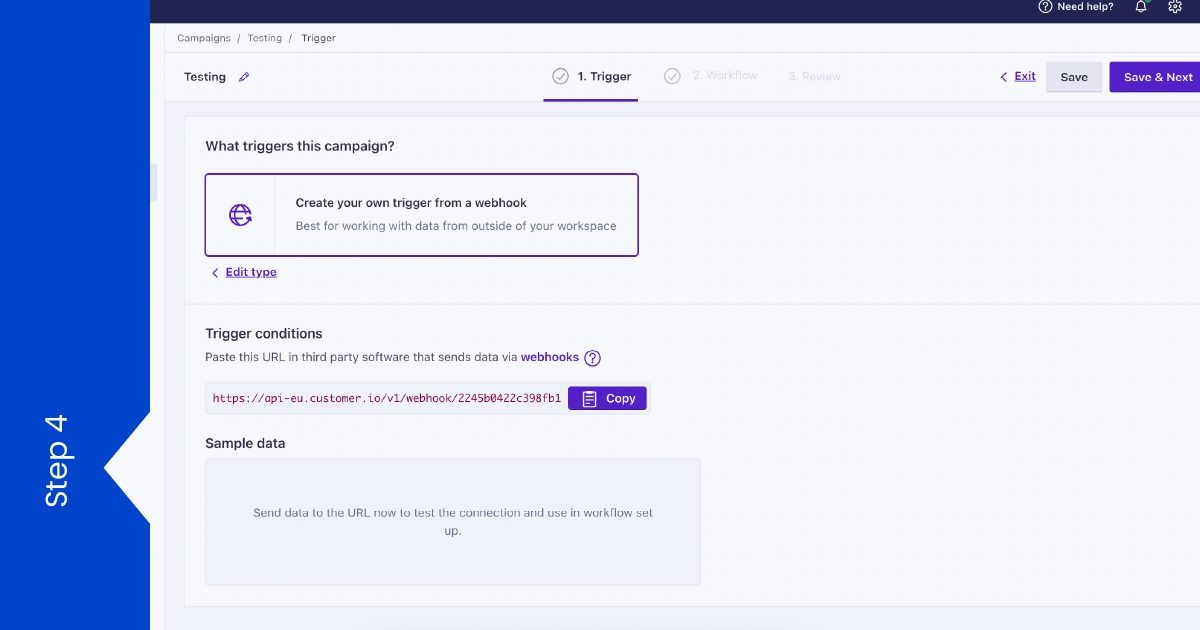
3. You’ll be redirected to the “Triggers” tab, where you’ll find an auto-generated webhook URL. From there, select “Save & Next”
Set Up a Webhook and Configure a Request
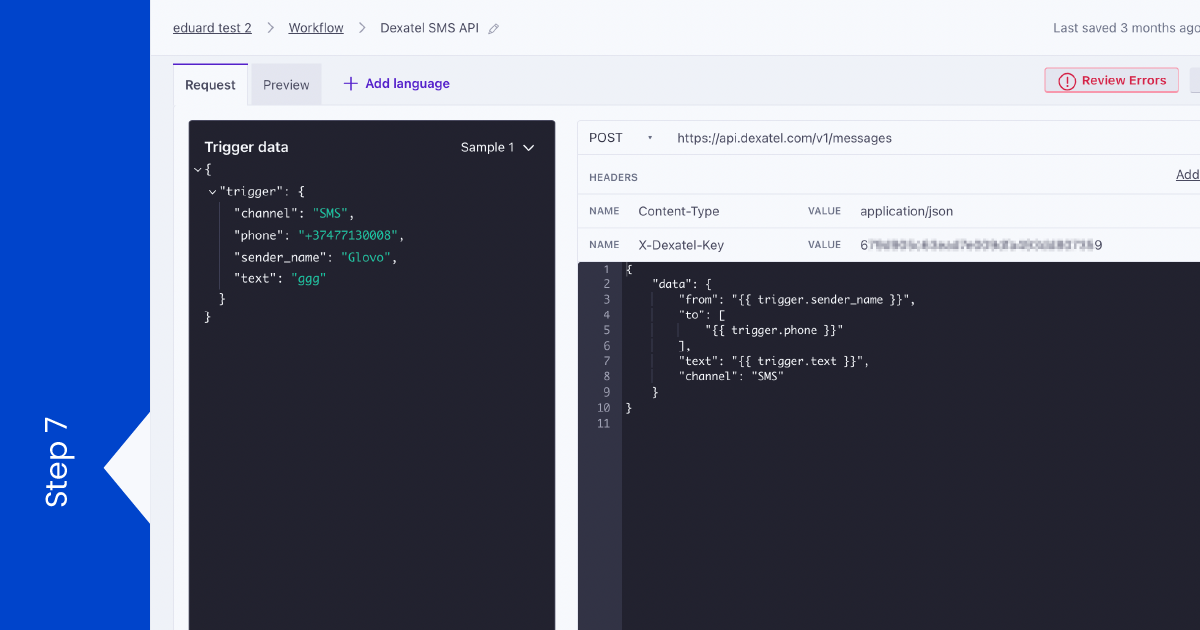
1. From the “Build” menu under the “Workflow” tab, drag a “Send Data” action to the Workflow canvas. The next step involves configuring a request to Dexatel’s text message API. You can learn more about the API here
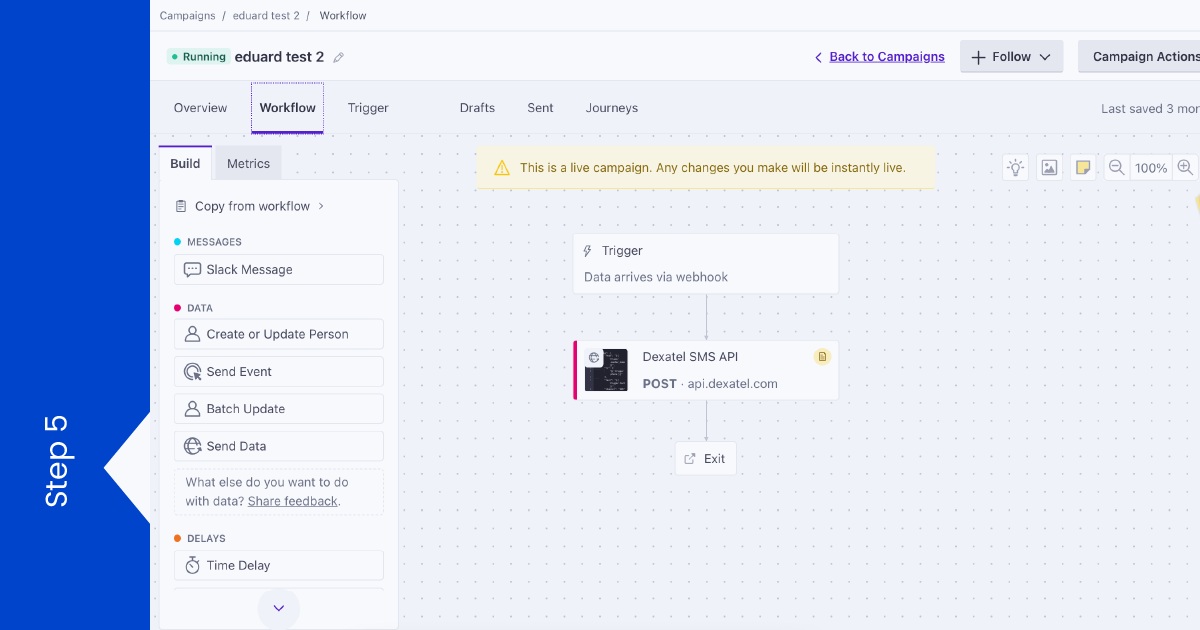
2. Click on the webhook. This will open a window on the left-hand side
3. Name your webhook and select “Add Request”
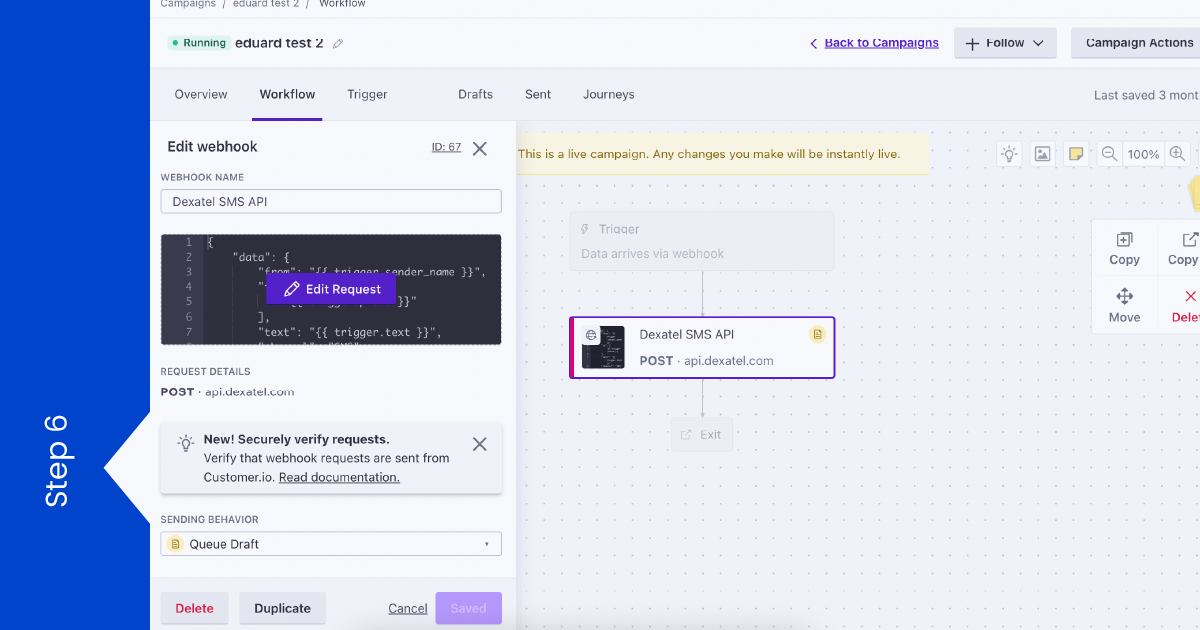
4. Select the “POST” method and add the API URL: https://api.dexatel.com/v1/messages
5. Click on “Add Headers” to add the following headers along with their values:
NAME: Content-Type; Value: application/json
NAME: X-Dexatel-Key; Value: Fill Your API key here
6. Copy and paste the following request body onto the request canvas:
{
"data": {
"from": "{{ trigger.sender_name }}",
"to": [
"{{ trigger.phone }}"
],
"text": "{{ trigger.text }}",
"channel": "SMS"
}
}
Note that “trigger.sender_name” is your sender ID, “trigger.phone” is your phone number, and “trigger.text” is the SMS message you’ll be sending.
7. Select “Save” to save your data
Review and Send Your Messages
1. Click on “Send test” to check if it works by sending a test message

2. Use your Trigger URL from the “Overview” tab to send messages from customer.io through Dexatel